

Free Tutorial: Simple Cross Stitched Pillow Pincushion With Tassels

This beginner needlework tutorial was first posted on my old blog several years ago. Many things have changed since then :) I no longer have time for embroidery, but I keep promising myself that one day I'll get to play with all those colorful boxes of meticulously sorted floss bobbins and a stash of beautiful linen fabric.
I still have the pictures, so I'll attempt to recreate this very simple visual step by step tutorial how to make a square pillow pincushion with tassels attached to all four corners. The number of tassels and the embroidery design (or any other decor!) are completely up to you.

The most important part is to get your backstich border right - the number of stitches must be exactly the same on both parts of your pincushion (and on every side if it's gonna be square). Here I used a pattern with square cross stitch border that helped me count the stitches, but if you make just a small ornament, please double check that your borders match up.

Tassels are attached to the corner point, and the "tail" is fixed on the outside of your backstiched border. This part will be inside the mini pillow so you don't have to be super tidy. Just make sure it's securely attached in place.


Next you start joining the two parts together. Bring your needle up at the corner, and start joining backstiched lines, step by step. You must pick first and first stitch on both parts. Follow the pictures:
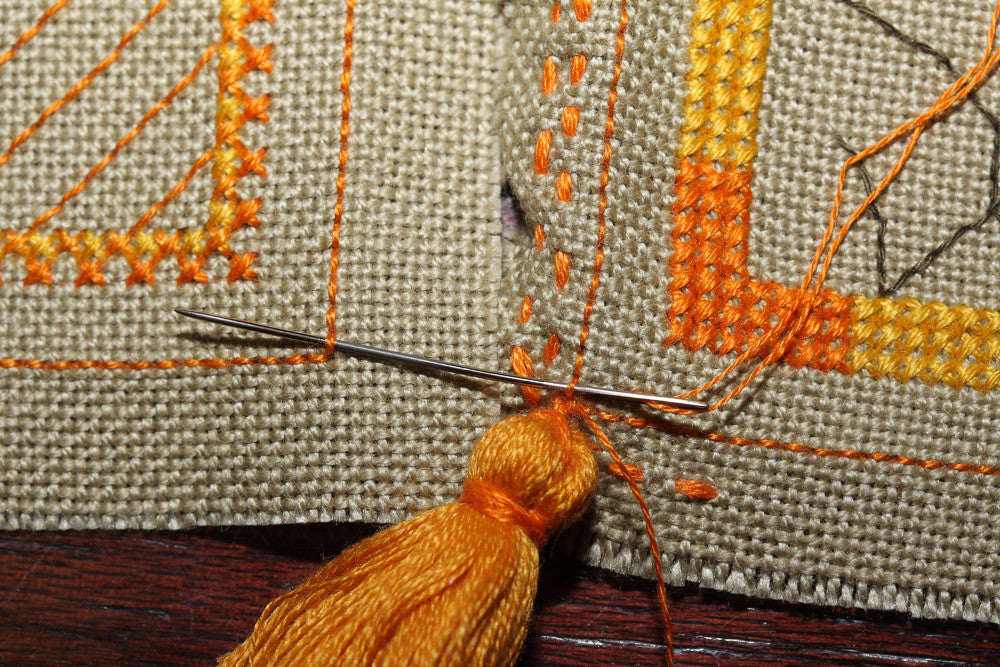


Turning a corner can be a little bit tricky. Keep the tassel out of your way, fold the extra fabric inside, and take your time sorting out which is your first backstich segment on both sides. Again, you must join first and first stitches.

At this stage don't try to pull your thread tight; keep it a little loose the first few stitches while you go around the corner. This will help you deal with the extra fabric inside the pillow corner.

Once you clear the corner, pull the thread gently to close the seam and continue stitching..

When you get close to the point where you started, it's time to stuff your pincushion and then close it up.


Finished :)
This pincushion was originally created as an autumn exchange gift on one of the cross stitch forums. It was fun :) Do people still organize secret exchange games on needlework forums?
4 comments
So gorgeous!!! Thank you for posting such a nice tutorial. I plan to teach it to my grand-daughter as a first real project. Hugs XX
It’s wonderful! 👍🥰🤗
Love all the beautiful crafts displayed. Thank for sharing.?
Exaurenti .
Graxie mille.